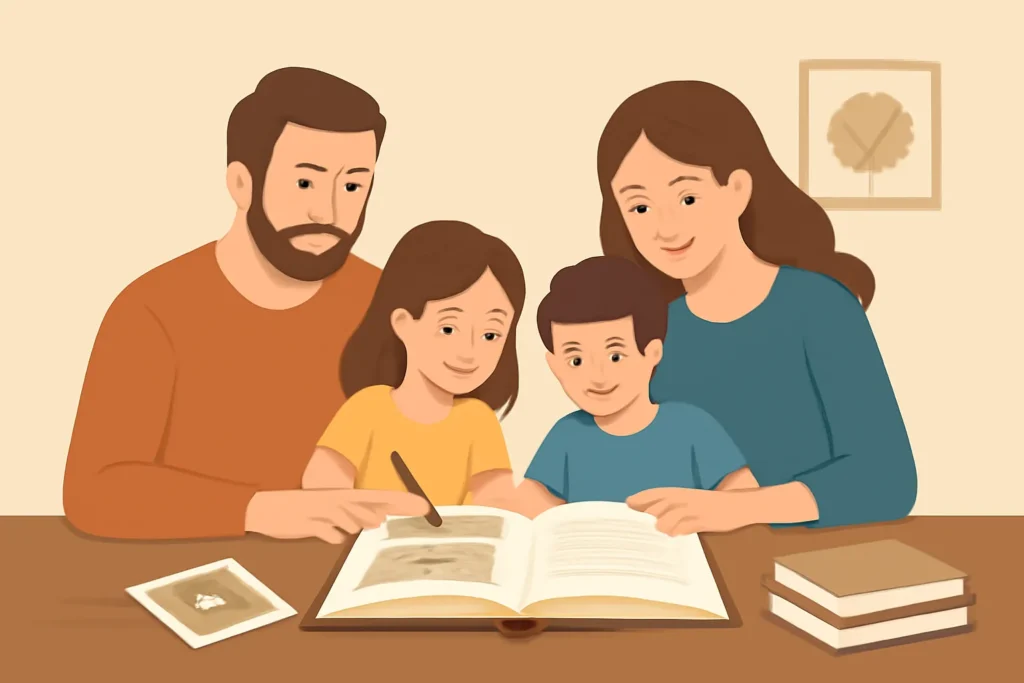
Preserving a family's story is about more than names and dates. It is about values, moments, and the ties that bind generations. Creating a family history book is a deliberate act of stewardship—turning scattered memories, documents, and photographs into a lasting artifact that can be shared with children, grandchildren, and future relatives. This guide details a practical, step‑by‑step approach to producing a comprehensive, readable, and meaningful volume. Whether you are documenting a single lineage or compiling a broader narrative of a community, the goal remains the same: to capture heritage in a way that is accessible, accurate, and alive.
Overview: what this guide covers
This article outlines a complete process, from setting purpose and audience to publishing and preserving the finished work. You will learn how to:
define the scope and intent of your project;
gather, verify, and source information;
organize materials with clear metadata and terminology;
design a layout that supports storytelling and readability;
navigate ethical and legal considerations, including privacy and permissions;
choose printing and digital formats that suit your budget and goals;
establish long‑term preservation strategies for both physical and digital copies.
Throughout, you will encounter variations of the idea of making a family history book—from creating a genealogical narrative to producing a pictorial memoir—each with its own emphasis. The core steps, however, remain broadly applicable across approaches.
Step 1: define your purpose, scope, and audience
Before touching a single page, clarify why you are undertaking this project and who will read it. A well‑defined purpose keeps the work focused and prevents scope creep. Consider these guiding questions:
What is the primary purpose of this book—documentation, storytelling, education for younger relatives, or a keepsake for a particular branch of the family?
Whose voices matter most—your ancestors, living relatives, or a scholarship audience?
How broad should the coverage be—one surname, a regional community, or a multi‑generational panorama?
What tone will you adopt—formal and archival, or warm and narrative‑driven?
Document the decisions you make in a brief plan. Name the target readers, set a rough page count, and outline the chapters. This early blueprint will guide later choices about format, length, and level of detail. If you are collaborating with others, determine roles and communication expectations so everyone knows how to contribute and what to expect from the project.
Step 2: assemble a workspace, tools, and workflow
Creating a family history book requires both creative and organizational effort. Establish a dedicated workspace and equip yourself with reliable tools. A thoughtful setup reduces friction and helps you stay consistent. Consider:
a quiet desk or table with good lighting;
digital tools for writing, organizing, and backing up data (computer, external hard drive, cloud storage, redundancy);
scanning equipment or a smartphone with a high‑quality camera for digitizing photos and documents;
audio recording device for interviews;
templates for metadata, captions, and sourcing to keep information uniform;
notebooks or a project management tool to track progress and tasks.
Develop a work routine that fits your schedule—daily if possible, or weekly blocks with clear milestones. A well‑documented workflow helps you recover quickly from interruptions and makes it easier for others to pick up and continue the project if needed.
Step 3: plan structure and format
The structure of your book determines how readers experience the material. There are several common architectures for a family history book, and you might blend approaches to suit your content:
Chronological narrative tracing a family line from earliest generation to present;
Thematic sections that group material by place, occupation, or life events (military service, immigration, marriage, etc.);
Pedigree and genealogical core paired with biographical sketches and stories;
Pictorial memoir centered on photographs, with captions that tell a story alongside the images;
Mixed‑media edition combining narrative, documents, letters, and oral histories.
Decide on a format that aligns with your content and your readers’ preferences. At this stage, sketch a rough table of contents, noting possible chapter titles and the types of material each section will include. Consider your printing or publishing constraints, as some formats translate more easily into physical books, while others shine in digital form (or hybrid editions).
Length and readability: aim for sections that are long enough to tell a story but short enough to hold attention.
Voice and perspective: decide whether to use first person (I/we) for intimacy or third person for an archival feel.
Captions and metadata: plan a consistent schema for dates, places, sources, and provenance of each item.
Step 4: collect and verify content
Content gathering is where your book begins to take shape. You will assemble oral histories, family records, photographs, letters, and other artifacts. Prioritize high‑quality, credible material, and document where each item comes from. This step often naturally reveals gaps that become research questions in later stages.
Interviews and oral histories
Interview relatives to capture memories, anecdotes, and context that written records cannot provide. Prepare a flexible list of open‑ended questions, and record permission to quote or reproduce their words. When gathering quotes, note the exact wording and the speaker’s context. Respect sensitivity and privacy concerns; some memories may be painful or private, and you may choose not to include certain details.
Documents, records, and dates
Locate vital records, census pages, parish registers, land deeds, and newspapers. Keep track of provenance and transcriptions. When possible, verify dates and places with multiple sources, and record uncertainties clearly. For data integrity, attach source citations to every fact. If a document is fragile, consider reproducing a high‑quality image rather than handling the original repeatedly, to protect the item for future generations.
Photographs, letters, and artifacts
Photographs carry emotional weight and visual history. Create a catalog with image IDs, people present, approximate dates, and the source. For letters or artifacts, write a concise description, explain significance, and note any permissions for display or reproduction. For any item that shows living individuals, obtain consent where appropriate and be mindful of privacy concerns.
Step 5: organize and catalog everything
Organization is the backbone of a usable, scalable project. A consistent cataloging system helps you find material quickly and supports future researchers or family members who may extend the project later.
Create a standard naming convention for digital files (for example, surname_firstname_event_yyyy), ensuring the rule is applied consistently across photos, documents, and audio files.
Develop metadata fields for each item: ID, title, date, place, people involved, type (photo, letter, certificate, interview), source, and rights.
Group materials into logical chapters or sections so that you can assemble content in a modular way.
Back up all digital assets in at least two secure locations (for example, an external drive and a cloud service). Consider a third offline copy for added redundancy.
With a well‑organized archive, you reduce later frustration and ensure that the story flow remains coherent even as you add new material or revise the text.
Step 6: draft writing and editorial planning
Writing a family history book blends storytelling with documentation. Approach each chapter as a narrative arc that balances facts with life stories. Use grammar, style, and voice that suit your audience, while maintaining accuracy and respect for the individuals involved.
Voice, tone, and accessibility
Adopt a voice that feels authentic to your family while remaining accessible to readers who are not specialists in genealogy. Avoid overly dense jargon unless you provide clear explanations. Consider including glossaries for terms that may be unfamiliar to some readers.
Lead with human interest: begin with a compelling anecdote or a defining moment to draw readers in.
Use a claro structure: establish context, present the event, then reflect on its significance.
Show, don’t just tell: integrate quotes, dialogue, or captions to bring scenes to life.
Balance breadth and depth: cover broad family trends while including vivid micro‑stories from individuals.
Step 7: design, layout, and visual storytelling
Design is not merely aesthetics; it influences readability and engagement. A thoughtful layout helps readers navigate the book and absorb information without feeling overwhelmed. Consider these design pillars:
Typography: choose readable typefaces for body text and headings; maintain consistent sizes and spacing.
Color and contrast: use a restrained palette to ensure photographs and text stand out and are accessible to readers with varying vision.
Image handling: crop and edit photos to fit the page while preserving essential details; include captions with context and attribution.
Navigation aids: include a clear table of contents, chapter summaries, and an index if feasible.
Captioning conventions: caption every image with date, people, place, and source; consider a consistent format for easy scanning.
Format choices: print, digital, or hybrid
Decide how you want readers to access the material. Options include:
Printed edition—a durable, tactile keepsake suitable for coffee tables and libraries;
Digital edition—PDF, ePub, or web format that is easily searchable and shareable, with dynamic features like hyperlinks and embedded media;
Hybrid solution—print for physical shelves and a digital companion with high‑resolution scans and interviews.
When planning layouts, ensure accessibility: consider larger fonts, alt text for images, and navigable digital formats. A well‑executed design makes the material inviting to readers of all ages and backgrounds.
Step 8: ethics, permissions, and privacy
Family histories intersect with real people’s lives. Handling sensitive material responsibly protects relatives and preserves trust within the family circle. Key considerations include:
Consent: obtain explicit permission to publish personal memories, especially for living individuals or sensitive topics.
Privacy and boundaries: avoid publishing information that could cause harm or distress to relatives without consent.
Photographs and portraits: secure releases for images that include people or private settings; consider restricting access if necessary.
Copyright and permissions: respect the rights of authors, photographers, and institutions; credit sources accurately and seek permissions when required.
Accuracy and revisability: include notes about uncertainties and provide a path for corrections if new information emerges.
Thinking through ethics early can prevent conflicts later. If your project involves living individuals who may object to disclosure, you might opt to anonymize certain details or delay publication of particular sections.
Step 9: production: printing, binding, and distribution
Turning your manuscript into a tangible book requires choosing production methods that fit your goals and budget. Consider the following:
Print‑on‑demand services offer low upfront costs and flexibility, allowing you to fulfill orders as relatives request copies.
Short‑run printers provide higher quality and more control over materials (paper stock, binding, cover design) for a fixed batch.
Professional editors and designers can elevate the manuscript with technical polish, image retouching, and layout refinement.
Digital distribution—Create a secure PDF or an ePub version that can be shared widely while preserving the content’s integrity.
Coordinate with your printer about specifications, proofs, and timelines. Gather final approvals from contributors or family members before ordering copies. Consider adding a preface or foreword that explains the project’s purpose, methodology, and благодарности (acknowledgments) to set the proper tone for readers.
Step 10: preservation, storage, and future access
Once your family history book exists in physical and digital forms, plan for its long‑term preservation. The best outcomes involve multiple copies in stable storage and formats that can be migrated as technology evolves.
Preserve physical copies in a cool, dry place away from sunlight; use archival quality storage materials when possible.
Maintain original digital files with regular backups in multiple locations, including at least one offsite or cloud backup.
Keep a master copy of the project files with a documented lineage of edits and versions.
Plan periodic reviews to refresh captions, supply new information, or update contact details for living relatives.
Thoughtful preservation means your work remains accessible to future generations, not just as a memory but as a resource for ongoing discovery and learning about family roots.
Step 11: sharing, archiving, and community engagement
Public sharing amplifies the value of your project. A thoughtful dissemination plan ensures that relatives, local libraries, and genealogical societies can access and learn from your work. Consider these strategies:
Host a family launch or digitization night to celebrate the project and invite feedback.
Donate copies to local archives, historical societies, or genealogical libraries to preserve a community record.
Create an online companion or excerpted version for siblings and cousins who may not own a printed copy.
Encourage relatives to contribute additional information, photographs, or corrections to keep the record accurate and dynamic.
When sharing, clearly outline permissions, intended use, and contact information for updates. Framing the book as a living document invites ongoing participation and keeps your family history relevant to new readers and researchers.
Tip‑heavy guidance: practical shortcuts and pitfalls to avoid
To help you navigate common challenges, here are pragmatic tips drawn from many projects in progress and completion:
Start small: if the scope feels overwhelming, begin with a single branch, a key story, or a favorite photograph collection to gain momentum.
Document as you go: record sources immediately; delaying can lead to memory gaps or misattributions.
Be explicit about uncertainties: label dates and places as approximate when evidence is uncertain to avoid presenting speculation as fact.
Preserve voices: prioritize direct quotations where possible; paraphrase only when necessary and always attribute.
Balance variety and continuity: mix narrative pieces with short entries to keep readers engaged without sacrificing coherence.
Engage younger readers: incorporate interactive elements in the digital edition, such as timelines, maps, or family trees that users can explore.
Seek feedback: ask several relatives to review drafts for clarity, tone, and sensitivity before finalizing a chapter or the entire manuscript.
Sample content formats you can adapt
In this section, you’ll find variations on how to present material within your book. Each format serves different kinds of content and readers—and you can mix them to suit your project.
Biographical sketches paired with anecdotes and primary sources.
Timeline spreads that place major events on a chronological axis with key artifacts.
Photo essays that tell a story through imagery, with minimal text.
Letters and diaries excerpts integrated into narrative sections to provide first‑person perspectives.
Maps and migration routes to illustrate how families moved across regions or countries.
Genealogical notes at the end of chapters that summarize relationships and sources.
An example of a cohesive workflow from start to finish
Here is a compact, actionable workflow you can adapt to your project. It blends planning, content gathering, writing, editing, design, and publication into a repeatable cycle:
Define purpose and audience — write a one‑paragraph brief and a one‑page audience map.
Build an outline — draft a table of contents and a chapter skeleton with a rough word count for each section.
Collect sources — gather photos, documents, and interview transcripts; record provenance for every item.
Catalog materials — apply a metadata schema and file naming conventions; back up data.
Draft chapters — write narrative sections, insert captions, and integrate quotes with citations.
Peer review — have family members or amateur researchers read for accuracy and tone.
Edit and refine — revise for clarity, balance, and sensitivity; ensure consistency across sections.
Design and layout — finalize typography, image placement, captions, and navigation elements.
Publish and distribute — choose print, digital formats, and distribution channels; prepare permissions and acknowledgments.
Preserve — implement a long‑term archiving plan and set up periodic reviews for updates.
Common questions you might have
Here are brief answers to some frequent inquiries about making a family history book:
What if I don’t have many photographs? You can still tell a compelling story through interviews, letters, and documents. Use evocative prose and descriptive details to paint a vivid picture.
How long should the book be? There’s no universal rule. Aim for depth without redundancy. A well‑balanced book often ranges from 120 to 320 pages depending on scope and audience.
Can I create a digital edition first? Yes, starting with a digital edition can help you refine content and flow before committing to print. It also enables easy collaboration with relatives who live far away.
How do I handle sensitive information? Always seek consent, anonymize when necessary, and consider separate appendices or restricted sections for particularly sensitive material.
What are cost considerations? Costs include editing, design, printing, and potential permissions. Start with a budget that covers a small print run and digital formats, then scale as demand grows.
Conclusion: preserving a living heritage
Creating a family history book is more than producing a record of the past; it is about establishing a bridge between generations. It invites current and future relatives to locate themselves within a broader story and to participate in ongoing discovery. Whether you opt for a documentary‑style volume, a narrative memoir, a genealogical compendium, or a richly illustrated portrait of daily life, the essential act remains the same: you are preserving heritage for those who come after you. With careful planning, respectful interviewing, meticulous sourcing, thoughtful design, and a sustainable distribution plan, you can complete a project that endures, educates, and inspires future generations to continue the family story.
Final checklist: quick reference for your project
Define scope and audience and write a concise project brief.
Assemble materials with clear provenance and permissions.
Create a metadata standard for easy retrieval and consistency.
Draft a table of contents and chapter outlines.
Interview plan with consent for quotes and reproduction.
Photograph and image plan with captions and credits.
Editing process including peer review and sensitivity checks.
Design plan for typography, layout, and accessibility.
Production options with budgets for print, digital, or hybrid formats.
Preservation strategy with backups and archival storage.
Distribution plan for family members and institutions.
Embarking on the journey to create a family history book can be deeply rewarding. By treating the project as a careful blend of research, storytelling, and craft, you will produce a resource that not only records the past but also reinforces the connections that bind your family together. The steps outlined above—planning, gathering, organizing, writing, designing, publishing, and preserving—offer a comprehensive framework you can adapt to any family, any region, and any storytelling style you choose. May your work be a lasting gift to your descendants and a meaningful tribute to those who came before.










Leave a Reply